Character acting
Acting for Characters: The Art of the Performance
In professional animation, a character is far more than a cool drawing. It is a set of blueprints that allows a team to speak the same visual language. To move from being an illustrator to a character designer, you must master the art of the model sheet. Character design is about performance: moving a character from a static concept to a living, breathing entity through whole-body acting and facial mechanics. Whether you are prepping a model pack for production or building a portfolio, your goal is to make the audience understand a character’s personality in a single second.
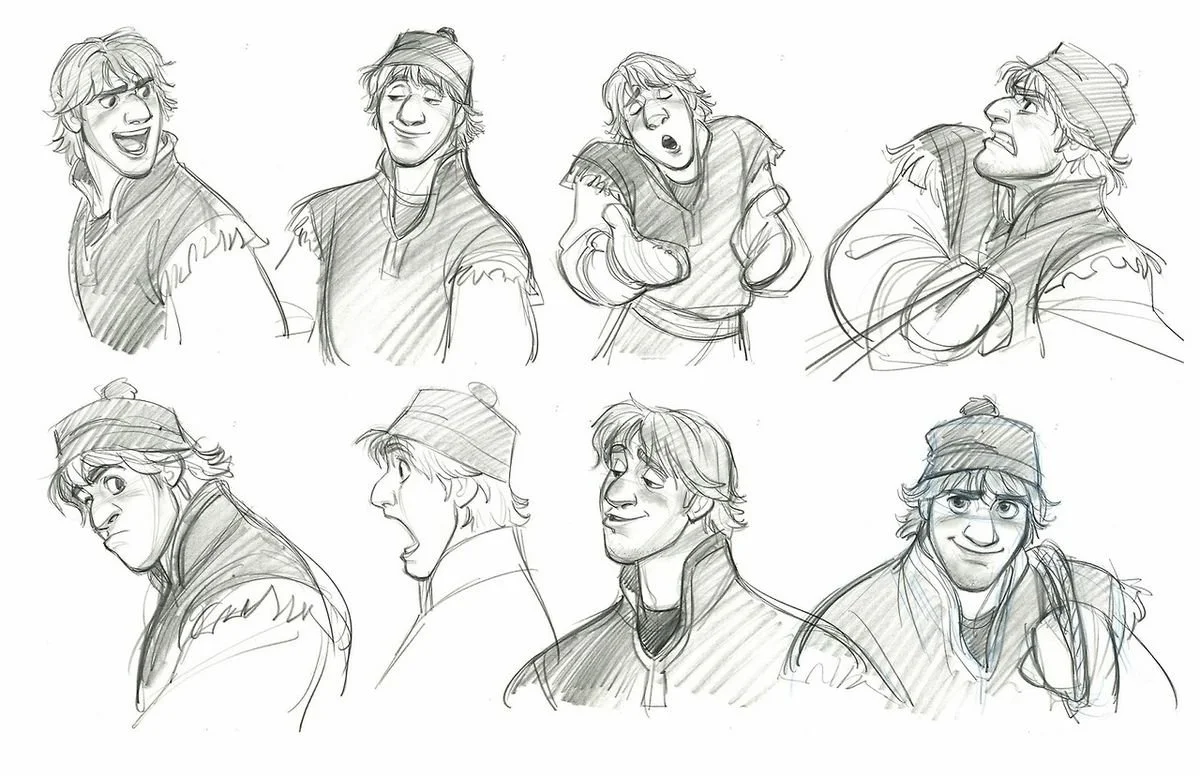
Expression sheet of Kristoff from Disney’s Frozen and was drawn by Jin Kim
The Masking Effect: Why We Connect with Lines
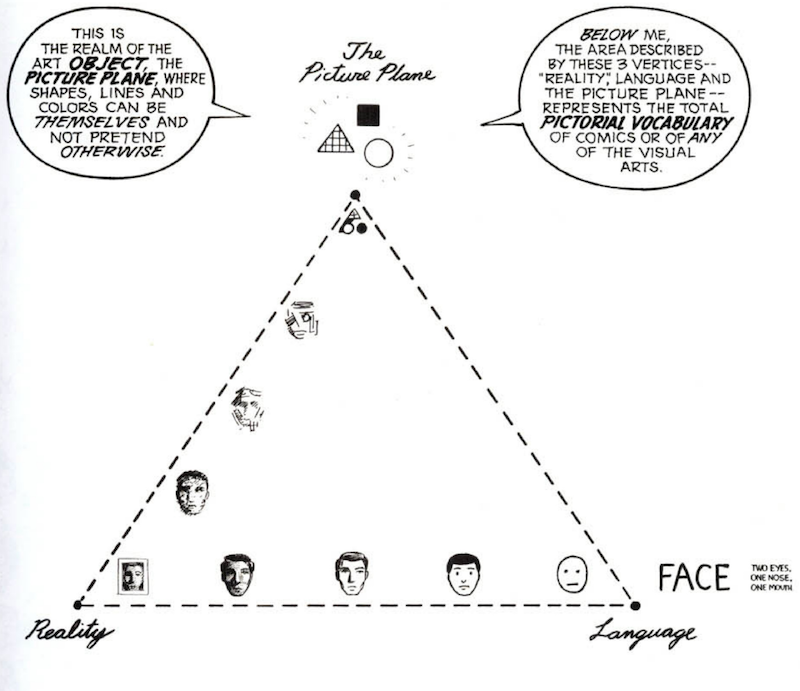
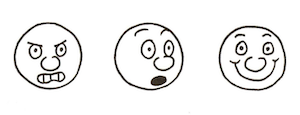
Why is it that we often feel a deeper emotional connection to a simple circle with two dots for eyes than we do to a hyper-realistic 3D render? This phenomenon is known as the Masking Effect, a concept popularized by theorist Scott McCloud. He argues that the further we move away from realism toward abstraction, the more easily the audience can project themselves onto the character.
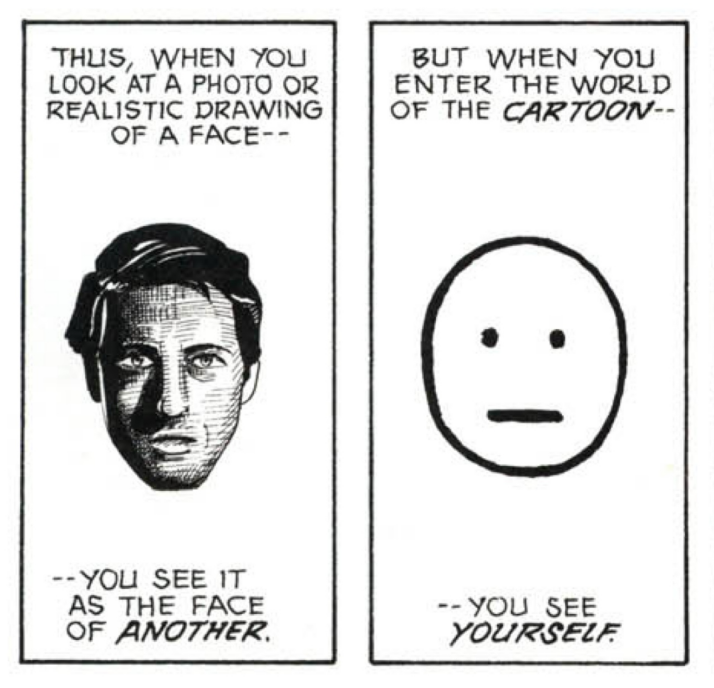
As Scott McCloud points out in Understanding Comics, the more 'cartoony' a face is, the more people it could be. He calls this the Masking Effect. By simplifying the features of our protagonist into an icon, we create a vacuum into which the viewer pours their own identity. McCloud, Scott. Understanding Comics: The Invisible Art. HarperPerennial, 1993. https://amzn.to/3NNEsZ8

Understanding Comics: The Invisible Art. HarperPerennial, 1993. https://amzn.to/3NNEsZ8
A realistic face is the face of a stranger. Someone specific with their own features and history. However, a simplified, iconic face is a "mask" that anyone can wear. By stripping away the distracting details of skin texture, pores, and individual anatomy, we allow the viewer to focus entirely on the emotional intent. This simplicity creates a vacuum that the audience fills with their own identity and empathy.
Understanding Comics: The Invisible Art. HarperPerennial, 1993. https://amzn.to/3NNEsZ8
The Foundation of a Pose: Dynamic Energy
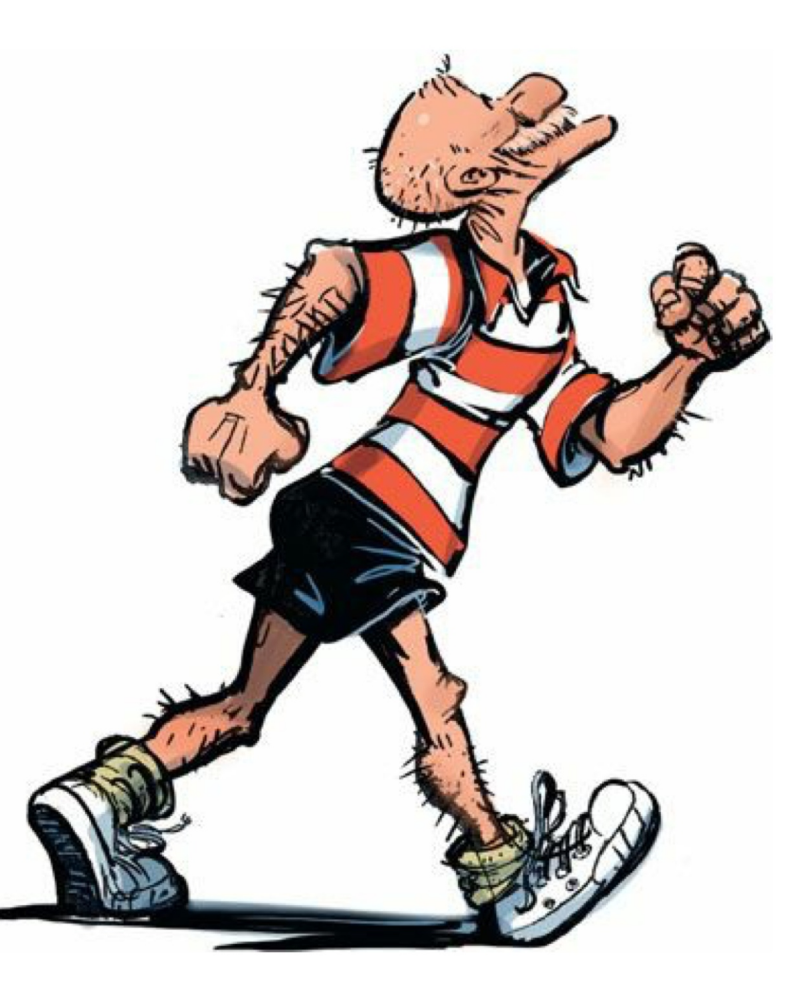
Every dynamic drawing begins with the Line of Action. This is a single, sweeping curve that defines the energy of the movement. Stiff, straight lines are the enemy of appeal. Instead, use fluid C-curves and S-curves to establish a rhythm and prevent the stiffness that plagues amateur designs. These curves provide a clear direction for the drawing’s energy, making the action readable at a glance.
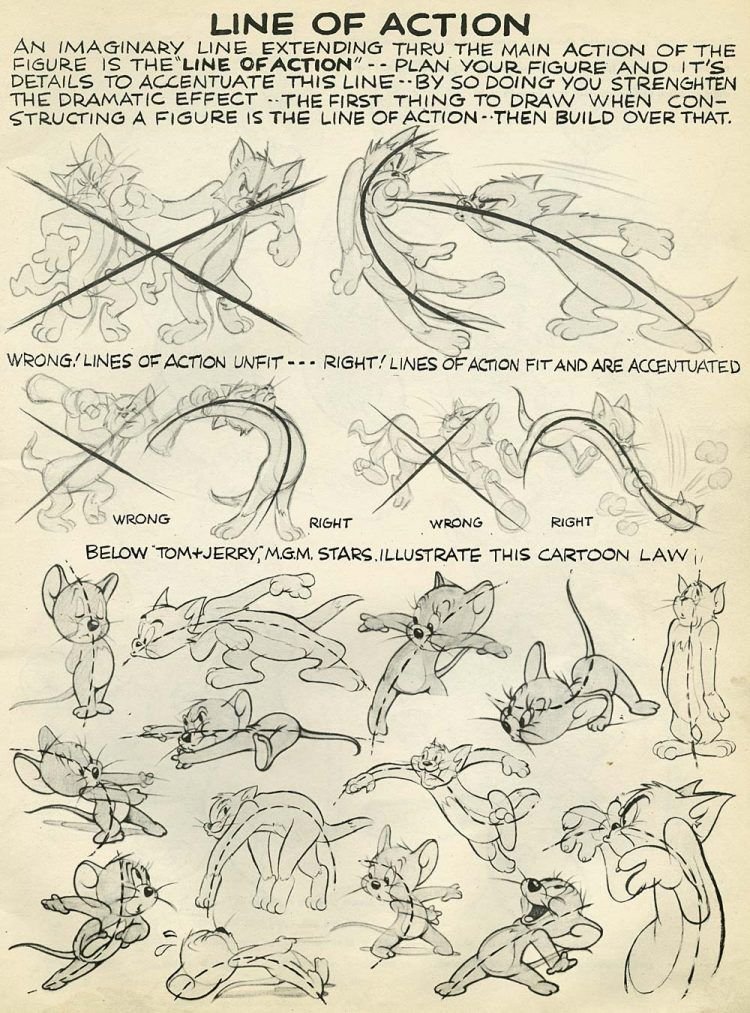
Blair, P. (1994). Cartoon animation. Walter Foster Publishing. https://amzn.to/4r1ZsK8
Once the energy is set, you must verify the silhouette. The fundamental test of a good pose is its readability; if you were to fill the character in with solid black, the action and intent should still be perfectly clear. If the silhouette is a muddy, tangled blob, you must adjust the negative space. Creating clear gaps between limbs and the torso ensures the viewer instantly recognizes the character's behavior.
Mechanics and Body Psychology
To avoid a "cardboard" look, artists use contrapposto, the principle of tilt and twist. In a natural stance, the angle of the shoulders should contrast with the angle of the hips. If the left shoulder is raised, the left hip usually drops to counterbalance the weight. This relationship creates a sense of gravity and stability that makes the character feel physically present on the ground.
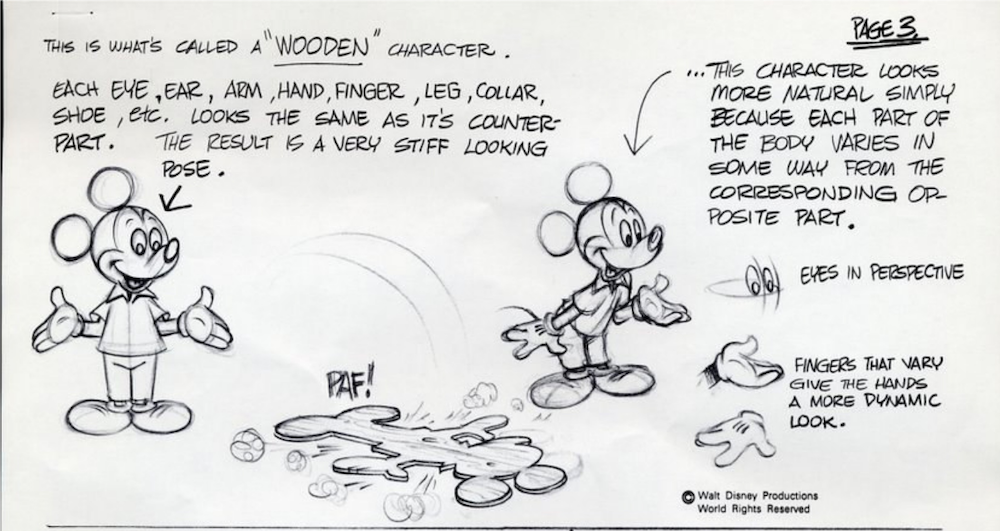
Comic Strip Artist’s Kit By Carson Van Osten- https://sevencamels.blogspot.com/2006/09/comic-strip-artists-kit-redux.html
Body language serves as visual shorthand for a character's inner state. Poses must prioritize storytelling, as every gesture is a deliberate choice that reinforces the character's core. A confident hero occupies more space with an open posture and an exposed chest. Conversely, a fearful or shy character might instinctively protect their "vital organs" by slouching or crossing their arms. Small details—like how a character pushes up their glasses or holds a tool—often tell more about their history than a page of dialogue.
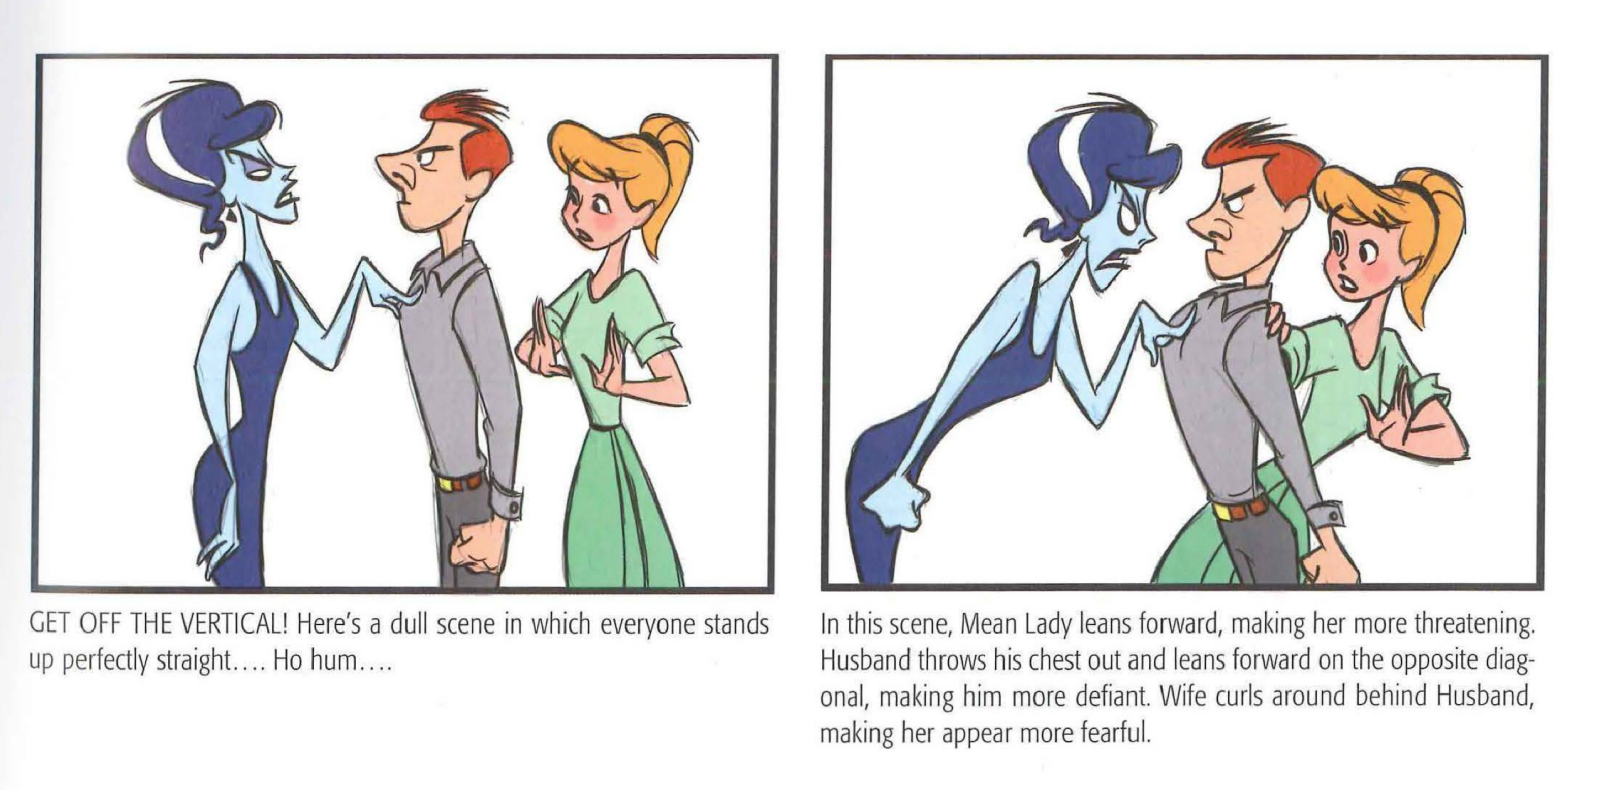
Goldberg teaches that every pose should have a clear "attitude." Whether the character is arrogant, shy, or excited, the entire body—not just the face—must broadcast that specific trait through the Line of Action. Goldberg, E. (2008). Character animation crash course!. Silman-James Press. https://amzn.to/4kfWWxE
The Language of Emotion: Mastering Expressions
Goldberg, E. (2008). Character animation crash course!. Silman-James Press. https://amzn.to/4kfWWxE
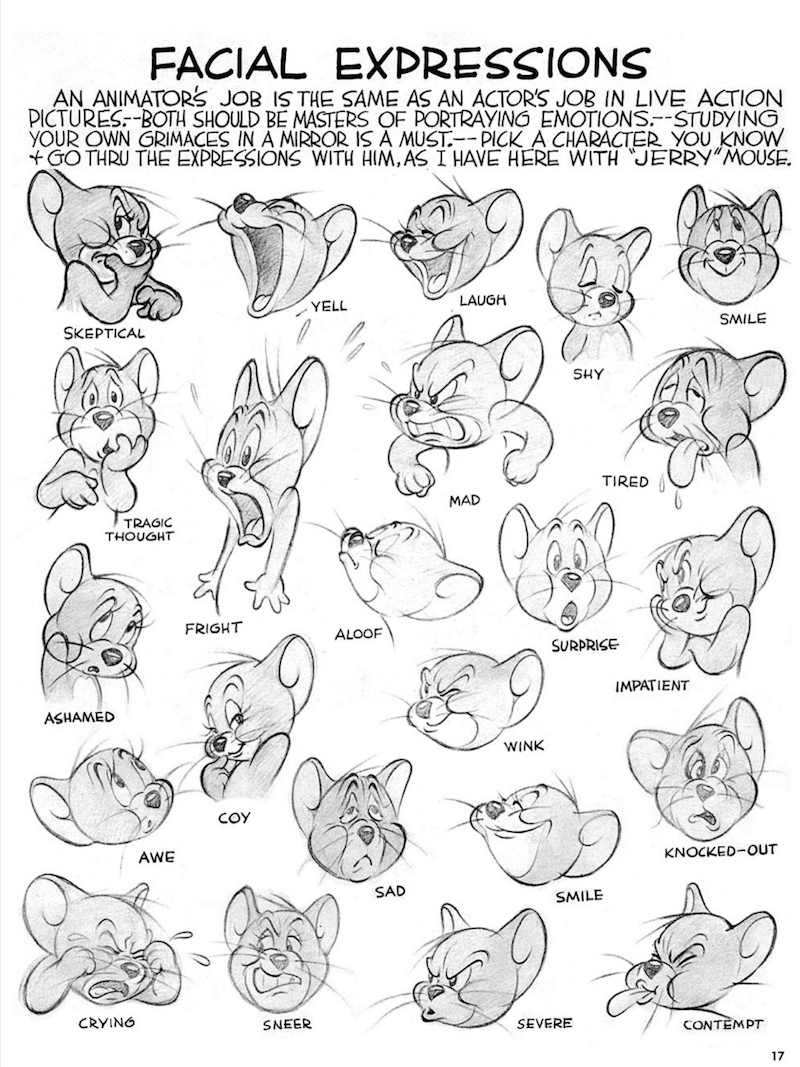
An expression sheet is the soul of your design. Its primary purpose is to show animators how a character’s personality manifests through their features. A professional sheet avoids repetitive faces by showcasing a wide range of emotional intensity. You should include extreme reactions where the face undergoes significant squash and stretch alongside subtle, quiet moments.
Blair, P. (1994). Cartoon animation. Walter Foster Publishing. https://amzn.to/4r1ZsK8
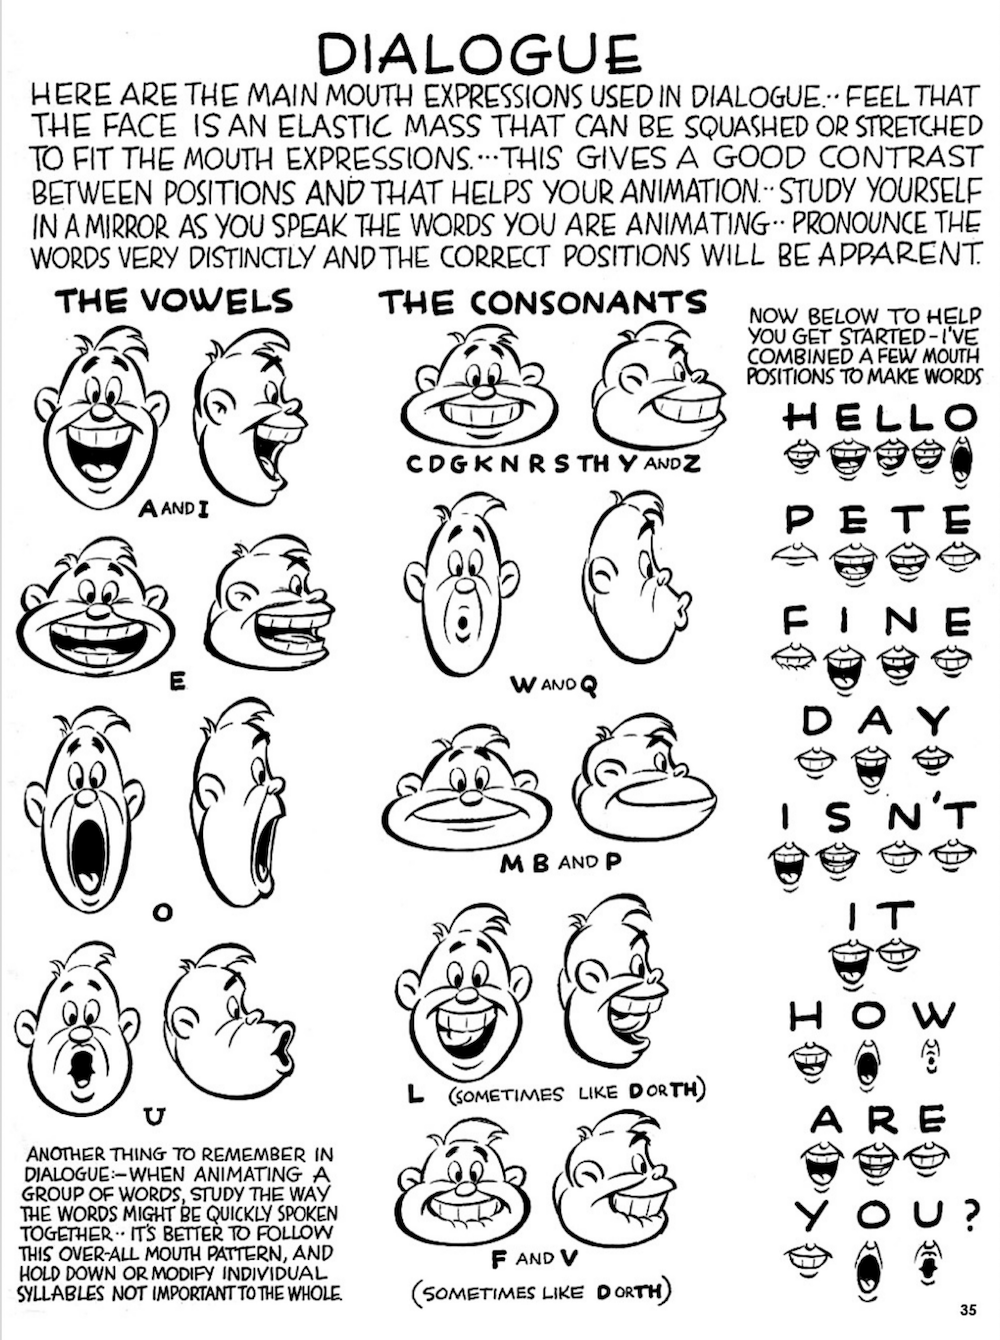
To keep the face looking organic, utilize asymmetry. Offsetting the eyebrows or the corners of the mouth prevents the drawing from looking like a mirrored plastic model. Keep the eyes as the focal point, as they are the most direct indicator of intent. For speaking characters, a mouth chart is a vital technical requirement. This consists of eight to fourteen key positions for standard phonemes like A, E, O, and M. A sophisticated designer creates two sets of mouth shapes: one for happy or neutral dialogue and another for angry or sad contexts to ensure the lip-sync matches the emotional weight of the performance.
Blair, P. (1994). Cartoon animation. Walter Foster Publishing. https://amzn.to/4r1ZsK8
Step One: Research, Shape Language, and the Line-Up
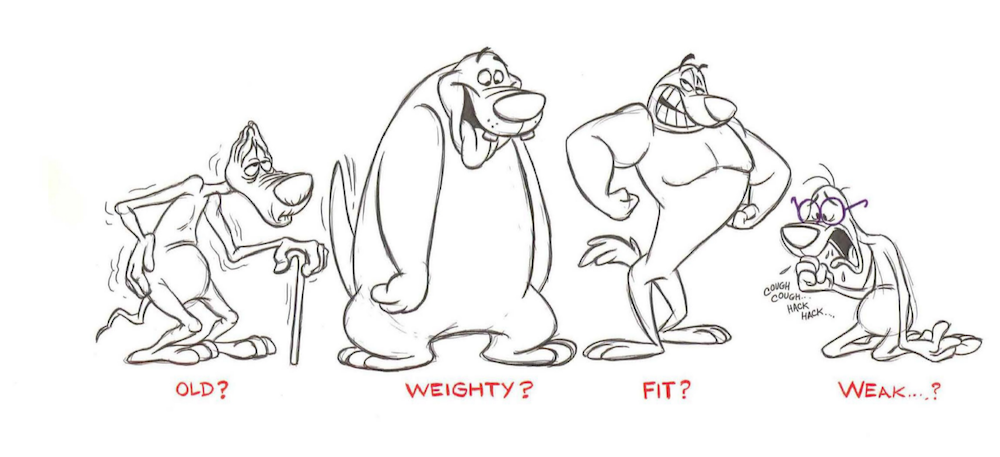
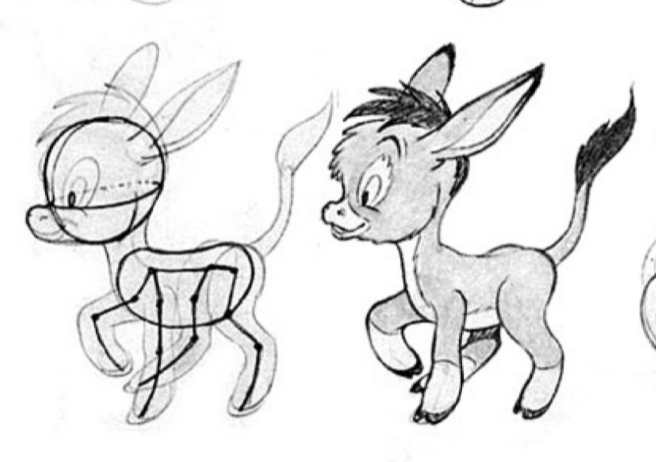
The professional workflow begins in the exploration phase, often called the "blob phase" because the focus is on large, simple shapes rather than fine detail. Last week, you utilized this process to develop your initial character line-up. By focusing on distinct shape language, you ensured each character is recognizable by silhouette alone. This foundational step is critical for maintaining "readability" across a production.
Goldberg, E. (2008). Character animation crash course!. Silman-James Press. https://amzn.to/4kfWWxE
When you worked on that line-up, you used the three-section method—varying the proportions of the head, torso, and legs to avoid "default" anatomy. This week, your challenge is to maintain that specific shape language while moving into the acting stage. You are visually rehearsing how those specific shapes move. A character built of sturdy, square shapes moves with a different center of gravity than one built of sharp, triangular shapes. Your thumbnails should be small, loose sketches that prioritize energy while strictly honoring the proportions you established in your line-up.
Blair, P. (1994). Cartoon animation. Walter Foster Publishing. https://amzn.to/4r1ZsK8
Step Two: The Acting Sheet and Performance
Now you must put the character through their paces. Start with loose gesture drawings to capture flow. Do not worry about perfect anatomy yet! Focus on the performance. Your goal is to select four or five key poses that define the character's range. This should include:
“DRAW VERBS!” Stanchfield, Walt. Drawn to Life: 20 Golden Years of Disney Master Classes: Volume 1: The Walt Stanchfield Lectures. Edited by Don Hahn, Focal Press, 2023.https://amzn.to/3NNjIkc
An Action Pose (running, jumping, or fighting).
A Personality Pose (slouching, leaning, or a signature gesture).
An Interaction Pose (handling a prop or tool).
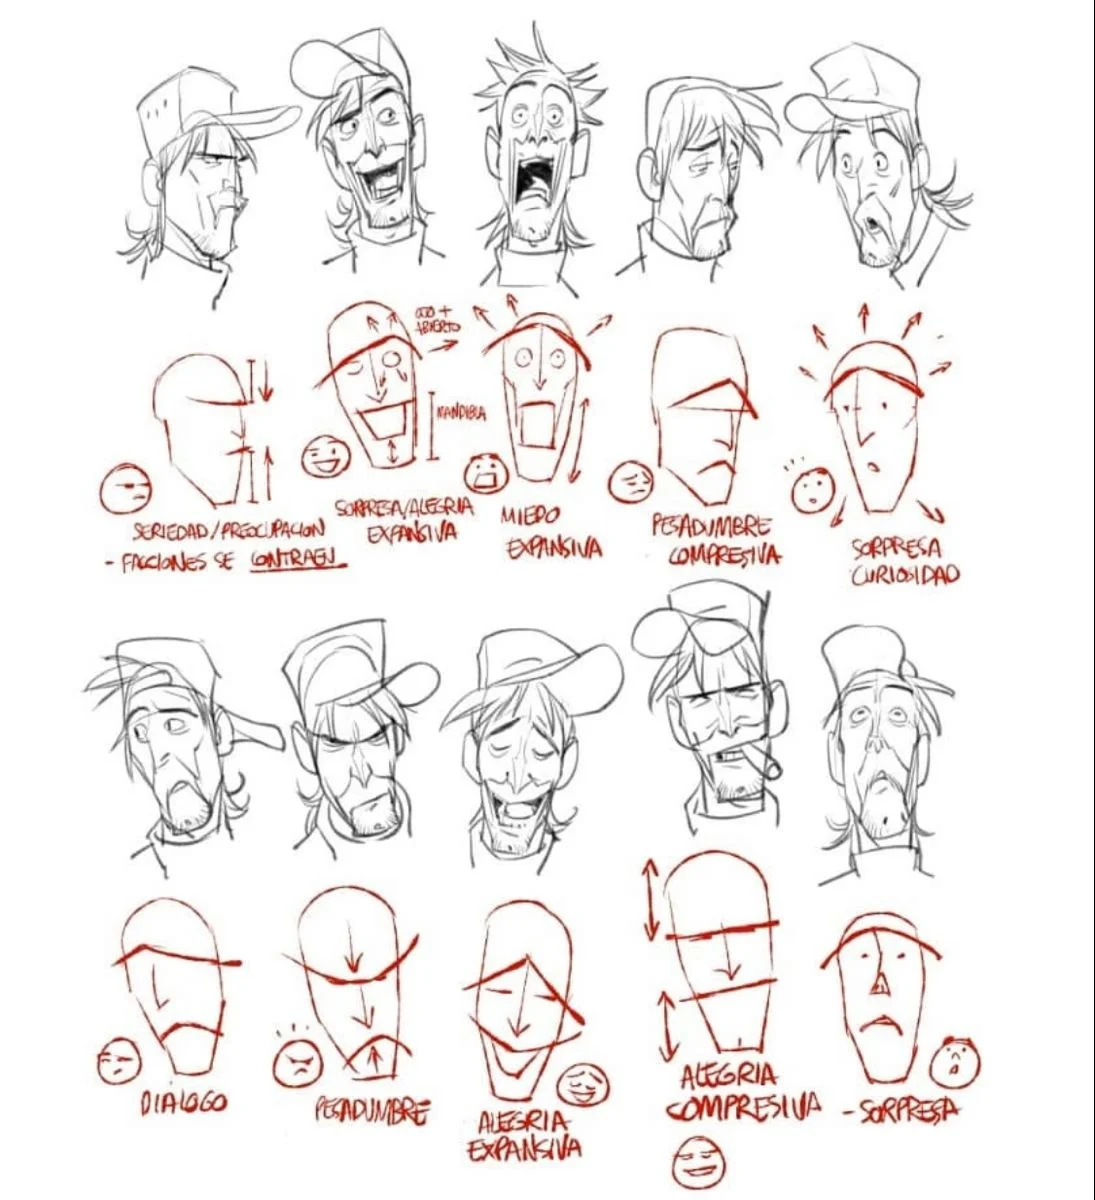
Pablos, Sergio. Facial Expressions and Mechanics Study. SPA Studios Animation Training, SPA Studios.
Once the gestures are selected, move into the tie-down phase. This is where you refine the anatomy and maintain consistent volume over your rough sketches. These are often called "tight roughs." Every detail of the costume and anatomy should be present and correct, but the lines can remain slightly sketchy before the final cleanup. This ensures the character stays "on model" while retaining the energy of the original gesture.
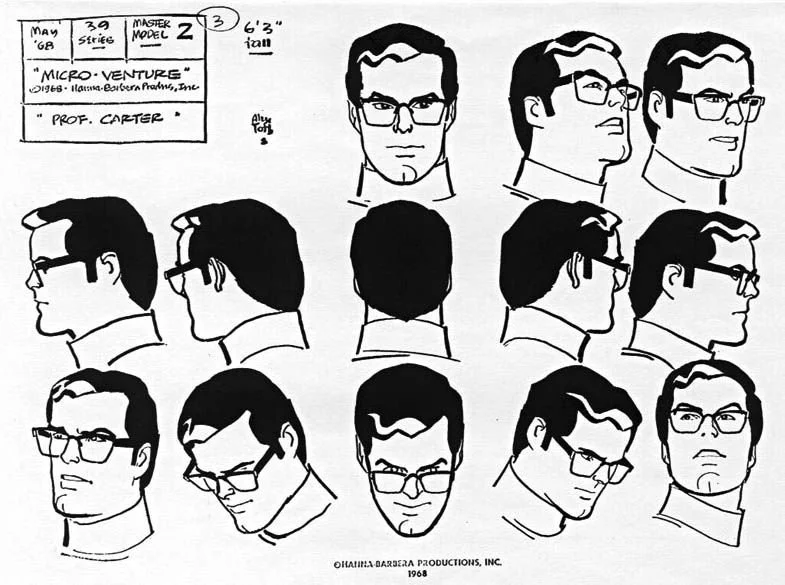
CLARK KENT By Alex Toth